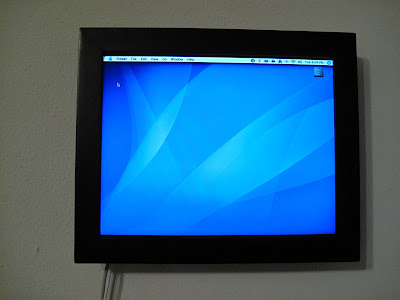
Note: The WallMac is also synced with an EyeFi card, so it also can be used for showing live slideshows. But I despise digital picture frames, so this function will be used sparingly.
I have the GeekTool System Preferences pane running and set up to display weather, time, date, etc. This all pops up automatically on start-up, and runs live on the desktop (not as an application).
Cutting the Frame to Fit the LCD
The 12.1" LCD screen of the PowerBook is almost exactly the same size as the opening of the 8"x10" shadowbox, so only a little cutting had to be done to get it to fit (make sure to leave room for all wiring that needs to connect back to the logic board.).
I used the brackets and screws that came with the frame that originally held the front glass in place to secure the screen.
From the front:
I used the brackets and screws that came with the frame that originally held the front glass in place to secure the screen.
From the front:
Mounting the Guts
After a while of just sitting and staring at the PowerBook innards, I finally thought of an easy, stable way to mount it: 22 gauge speaker wire. I had a lot left over from the MAME project. so I cut a few pieces and threaded them through the grommet holes of the little swivel things on the back. No drilling or cutting.
The speaker wire basically acts as large twist-ties (except stronger and insulated).
One vertical wire, one horizontal wire, and one to hold the HDD in place.
The wire threaded around the back:
The speaker wire basically acts as large twist-ties (except stronger and insulated).
One vertical wire, one horizontal wire, and one to hold the HDD in place.
The wire threaded around the back:
Cutting the Frame to Fit the Guts
In the bottom of the frame I drilled a hole through which the 2 cables (power & audio) could be threaded.
Final mounting inside the frame. I Dremeled out three spaces for the supports that are holding the screen. Since it is a little thicker than the glass that was originally there, the supports were no longer flush.
I secured the power button under the top right inside lip with just some electrical tape.
Then stuck it on the wall with 3M mounting strips.
Powering Up
For scale, here is a wide shot next to a 50" plasma (and the MAME in the background!)
Close up after boot:
Subscribe to:
Posts (Atom)